
Bloom Bloom Pow: Cutting the triangles
Aaaand we're back to the Bloom Bloom Pow quilt-along—it's time to cut your triangles!
This is the fun part (I think). : )
First, you will need either a 60-degree equilateral triangle ruler or this template. I highly recommend investing in a ruler—any 60-degree triangle ruler with finished triangles up to 7" and a vertical center line will work (but I love this one right here). You'll be cutting a lot of these triangles, so if you use the template, edges may get shaved off as you cut, eventually distorting the triangle shape. And I promise you will use a triangle ruler for plenty of other things, not just this quilt-along! Triangle quilts are very popular right now, after all. So think about picking up a ruler before you start.
If you are going to use the template, click here to download the template, and print out the template with no scaling. (Make sure "Actual size" is checked or "Fit to Page" is unchecked, or set scaling to 100%—and don't print the PDF directly from Google Docs, as the size may not print accurately). Cut out the printed template and adhere it to cardboard, or trace it onto template plastic and cut out the template plastic. (One advantage of template plastic—and, of course, a ruler—is that it is transparent, which will come into play in just a moment when we start cutting.)
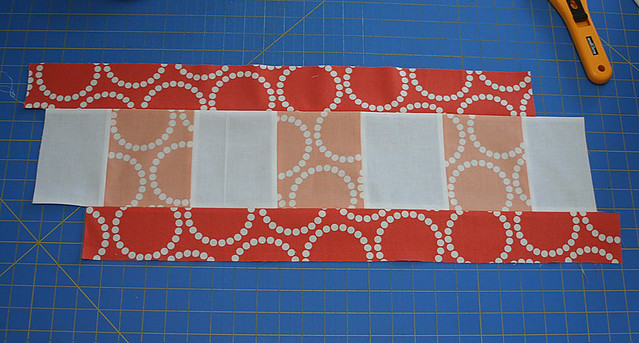
Okay, now we're ready to start cutting! Get out one of your pieced blocks.
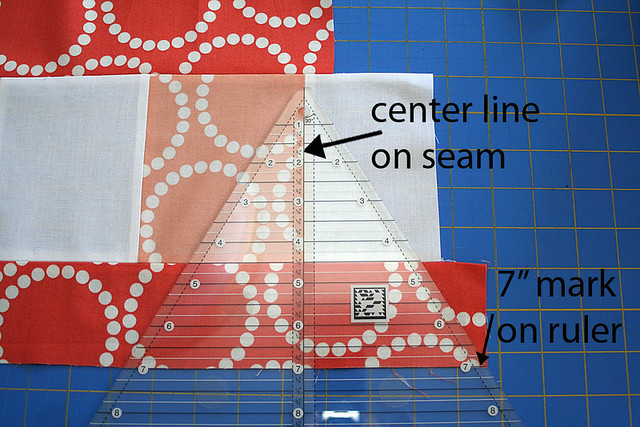
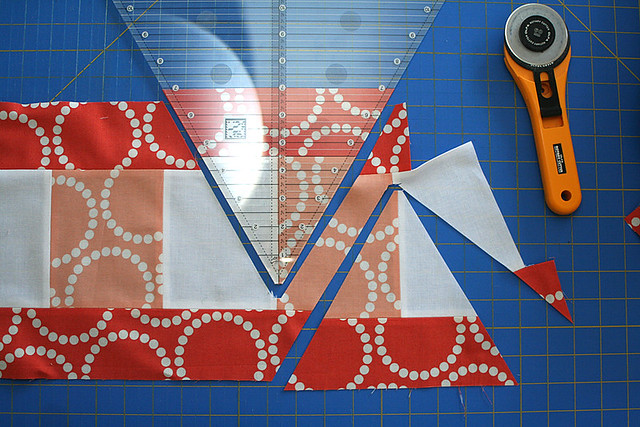
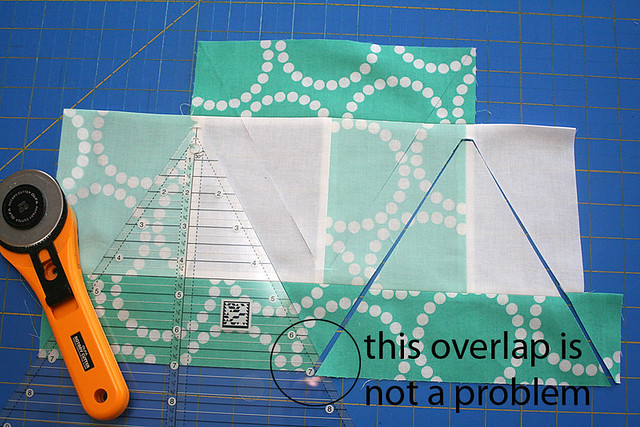
Place your ruler or template on the far right side of the block, as shown above. The 7" mark of your ruler (or the bottom edge of your template) should be aligned with the bottom raw edge of the block.
The center vertical line that goes down the middle of the triangle ruler or template should be aligned with the vertical seam in the block—a colored background piece should be to the left of that center line, and a white piece should be to the right of the line. (This is where a transparent template, such as a ruler or template plastic, becomes very helpful!)
As you can see from the photo above, the tip of your triangle ruler or template does not need to touch the darker petal strip at the top of the block.
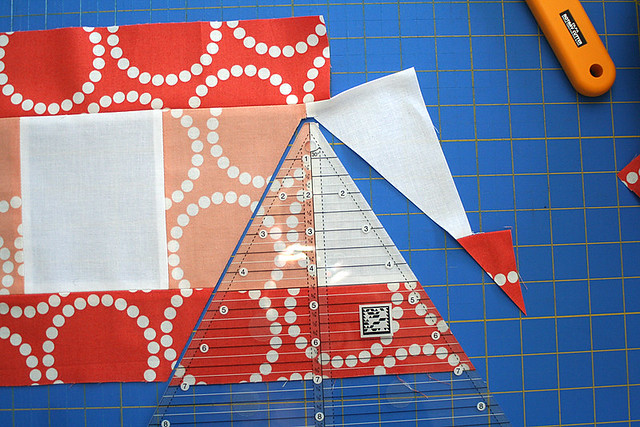
Now take a deep breath and cut around your ruler or template. : ) Yes, it's an awkward angle for cutting, but there's really no way around that. You can always turn the whole thing (both the pieced block and your ruler or template) in whatever direction works best for you.
When you're done cutting that first triangle, simply turn your ruler or template upside down and move it to the left, to the next vertical seam over. Place the ruler or template on the fabric, this time aligning the 7" mark on your triangle ruler with the top raw edge of the block, and the center vertical line on the ruler or template with the vertical seam.
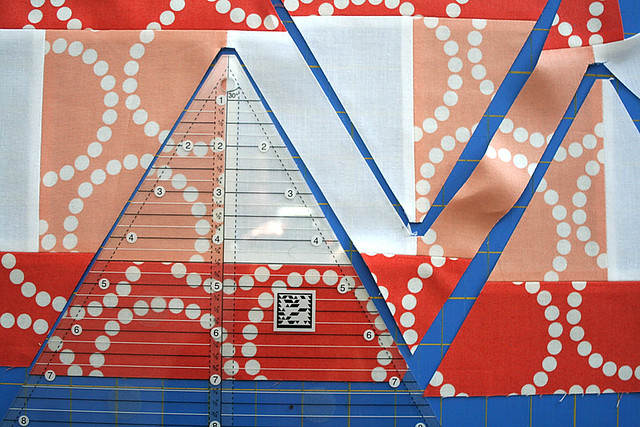
And turn your ruler/template over again to cut the third triangle. Continue in this way, working your way across the strip-pieced block, from right to left. From a full pieced block (made from 25" strips), you should be able to cut 6 triangles (which together will make one full Bloom Bloom Pow block).
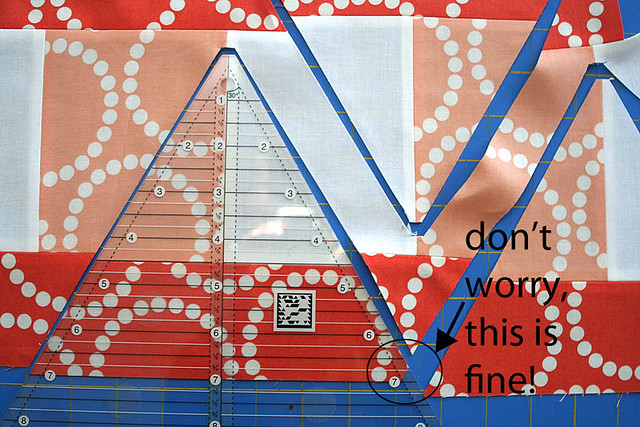
One thing to note—see that little notch cut out of the lower right corner of the triangle behind the ruler? You will get that as you cut these triangles—but don't worry, that little notch is completely fine. As long as it's not much bigger than what you see in the photo above, the notch will be caught in your seam allowances later and you'll never even know that it's there. It's similar to the tip of the triangle being cut off on the ruler. No worries!
But this is something to worry about. As you're cutting your triangles, do NOT continue the cut straight across the block and off the other edge. Go completely around the ruler or template with no excess cuts, as I did in the orange blocks above.
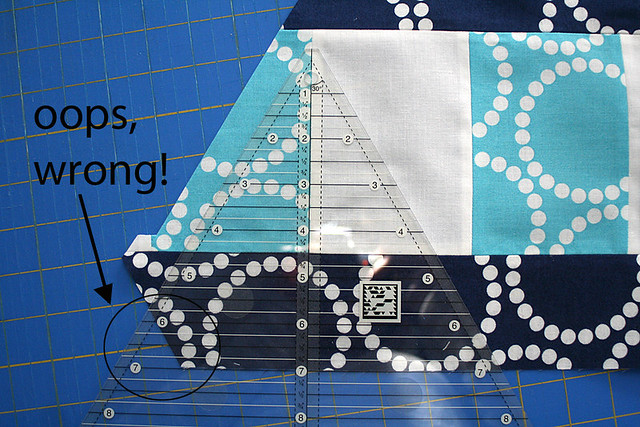
I didn't do that in the picture of the blue block here, and you can see that the results are problematic! If you cut them that way, when you turn the ruler around and try to cut the next triangle, you will end up with a big chunk missing from a lower corner of the triangle (as shown in the photo above). Which means you won't get enough triangles out of your block sets.
If you have the shorter fat-quarter-friendly pieced blocks, the cutting works the same way, except that you will only get three triangles from each pieced block instead of 6. As you can see, once again you'll get a bit of a notch cut out of the lower left corners of some of the triangles you're cutting. This is fine—the notch will be caught in the seam allowances later.
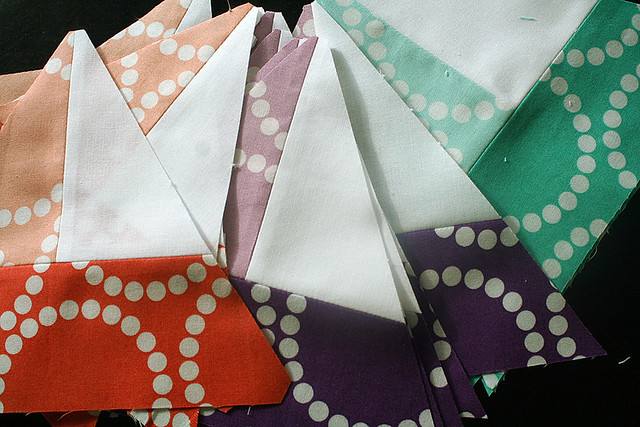
I think that's it! From each full block set, cut 6 triangles, and from each shorter block set, cut three triangles. Be sure to keep your triangle sets together and organized, since they'll be sewn together into blocks next week. So exciting! Be back here same time next week. : )
And don't forget, you can post pictures of your progress and check out everybody else's Bloom Bloom Pow quilts in my Flickr group! It's a big part of the fun of a quilt-along, so get over there! : )
Quilt-Along Schedule
March 21: Introduction and Fabric Requirements
March 28: Design Strategy
April 4: Cutting Your Fabric
April 11: Make the Strip-Pieced Units
April 18: Cutting the Triangles
April 25: Completing the Top
May 2: Quilting
May 9: A Finished Quilt