
Bloom Bloom Pow: Almost there!
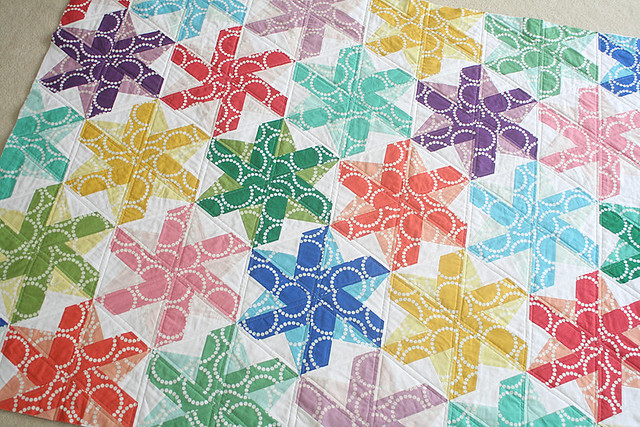
I can't believe we're already on the last step of the Bloom Bloom Pow quilt-along. It went crazy fast, didn't it? But that means it's time to quilt! You'll have a finished Bloom Bloom Pow in no time!
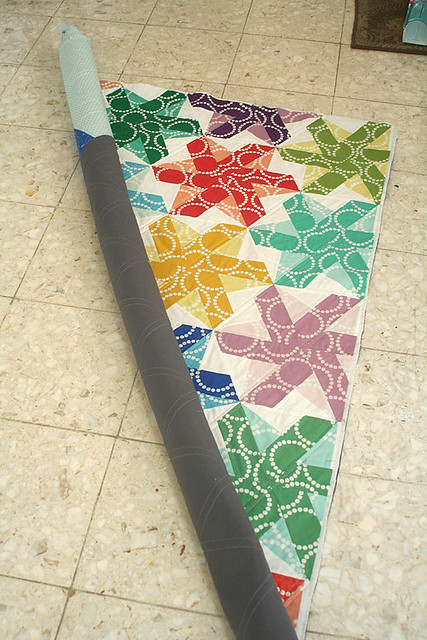
The first step is trimming the excess from the edges in order to square up the top.
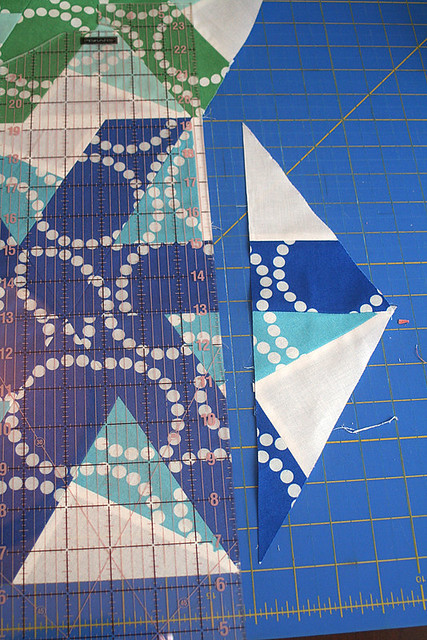
To do this, I took my longest ruler (24") and lined it up along the edge of each block. I just made sure the edge of the ruler intersected with the narrowest point of each block along the edge of the quilt, while the bottom raw edge of the quilt top remained perpendicular to the edge I was trimming (as shown). If your piecing was accurate, this method should give you a nice square quilt top, but you will probably want to square up again after quilting either way.
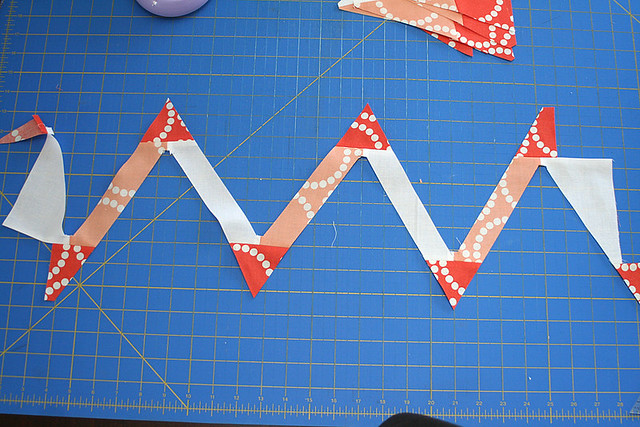
Once the top is trimmed, it's time to make your quilt back. This is a great opportunity to use some of the scraps from your Bloom Bloom Pow bundle! (Although I think the Pearl Bracelet prints are great scrappy additions to other projects as well, so they might be worth saving and stashing for future use.)You could also incorporate into the back any extra blocks you may have made, or maybe even the zig-zaggy waste scraps that were created when you cut out your triangles (shown above). They would probably have to be appliqued onto the back, but it is an option for the really ambitious. : )
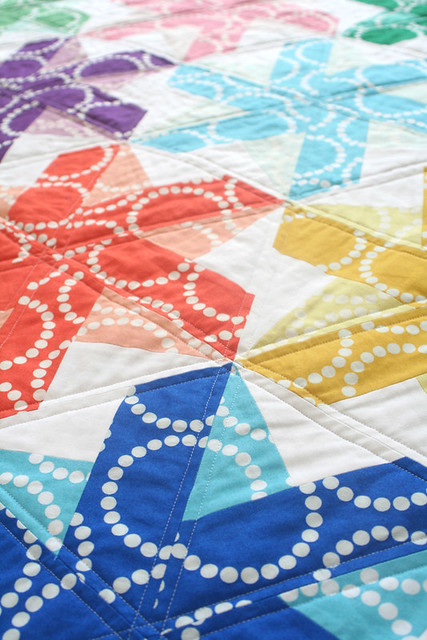
Now you're ready to baste and quilt. When it comes to quilting a top made up entirely of triangles, I don't think anything can beat the look of straight-line quilting that follows the angles created by the triangle seams. And with the busyness of the piecing in this design, I thought simpler would be best. So I quilted straight lines about a quarter-inch out from each side of the triangle seams—just like I did with my triangle baby quilt a few months back.
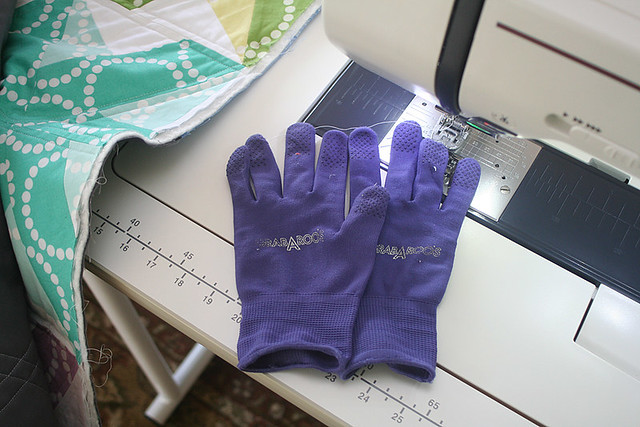
For straight-line quilting, you'll want a walking foot, and I think the quilting gloves normally used for free-motion quilting are very helpful for straight lines as well. Straight lines also require a good grasp on the quilt, and the gloves make that a lot more comfortable!
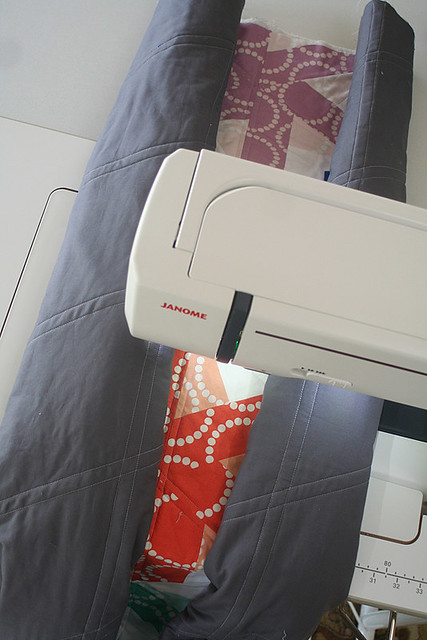
I started by quilting along the horizontal seams created when the rows were joined. Roll each side of your quilt up toward the center, so that you can start quilting in the center and work your way out toward each edge.
Once you're done with those horizontal rows, quilting from the center out isn't quite as important, since you already have evenly distributed quilting that holds all the layers in place. So when quilting the angled seams, roll the quilt from one corner, following the angle you'll be sewing. Re-roll the quilt each time you start a new seam.
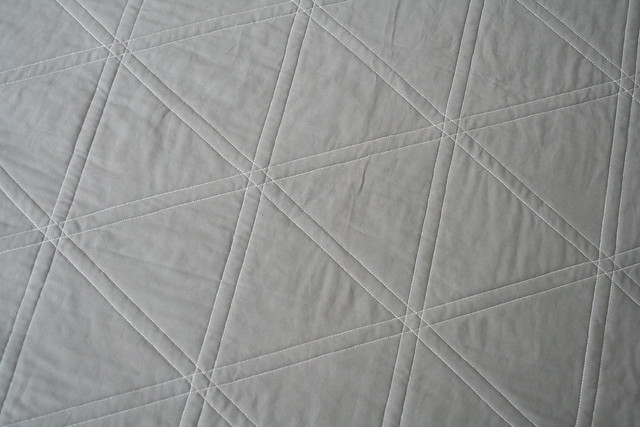
From the back, this quilting makes a very cool hexagon/honeycomb pattern.If you like a more densely-quilted look, another option can be found today on Lady Harvatine's blog. She's currently running her own Log Pyramid quilt-along and is showing another great way to echo the triangle piecing, which would work just as well for Bloom Bloom Pow as it does for her Log Pyramid design. Check it out!
The final step, of course, is to bind. I haven't made it that far yet, but I'm currently trying to decide between a scrappy binding (made up of my Pearl Bracelet leftovers), or white to match the background.
Next week I'm going to do one final round-up post, featuring a few pictures of some finished Bloom Bloom Pows from the quilt-along. Hopefully I'll have better, completely finished shots of my quilt by that time. It's another windy, gray day around here today, not at all conducive to quilt photo shoots, but maybe springtime will make it's return by then. : )
And thank you, everyone, for quilting along with me, it's been so much fun! Can't wait to see all of your finished (or almost finished) quilts next week!
Quilt-Along Schedule
March 21: Introduction and Fabric Requirements
March 28: Design Strategy
April 4: Cutting Your Fabric
April 11: Make the Strip-Pieced Units
April 18: Cutting the Triangles
April 25: Completing the Top
May 2: Quilting
May 9: A Finished Quilt