
Quilting 101: Sewing equilateral triangles

Welcome back to my three-part series on the basics of quilting with equilateral triangles! In Part 1 of the series, we talked about how to cut equilateral triangles from fabric. But once you have the triangles cut, piecing them with perfect points can be tricky! With these simple tips, you’ll be sewing your quilt top together in no time.

But first, let’s talk about how your cut triangles have one edge that is on the straight-of-grain. See how the threads of the fabric are running perpendicular to one edge of the triangle? This edge is on the straight-of-grain. Why is it important to pay attention to the straight-of-grain? Because the other edges, being cut on the bias, will stretch and distort more.
So ideally, as you’re piecing your triangles into rows, you’ll want to keep that straight-of-grain edge along the bottom/top of the row, not on the sides of the triangles. So while you’re sewing the triangles together into rows, you’ll always want to be piecing on a bias edge. By doing this, your rows will stay nice and neat and unstretched, and all those seams will come together better when you start joining the rows.
Okay, so now that we know which edges we need to sew along, let’s do some piecing!

Match up your first two triangles, right sides together, as shown. Your triangles should match up perfectly. (In the photo above, I have one corner of the top triangle folded back only so that you can see the triangle underneath it and how they line up. Both of your triangles should be flat.)
Don’t forget to pay attention to the straight-of-grain—you need to make sure the straight-of grain edges of your triangles will always end up either at the bottom or the top of the row! If you orient your triangles the way I did in the above photo (so the straight-of-grain is at the bottom of the first triangle), and you’re always piecing from left to right (again, as I am in the photo above), then the straight-of-grain edge should always be on the left as you’re adding triangles (which means it will end up at the top or bottom when sewn into place). Clear as mud? 😂I have the straight-of-grain edges labeled in the photo above, but this will probably make more sense as you piece the triangles.


Press the seam you just sewed. (Pressing the seam will help you sew on the next triangle more accurately, so don’t skip this step or wait until later!) I like to press my seams open because it reduces seam bulk, but you can also press to the side if you prefer. Just pick one side and stick with it for that particular row, then press in the other direction for the next row, and continue alternating.

Match up the previously sewn triangles with the next triangle in your row, right sides facing, as shown. (Again, I’m folding down one corner of the top blue triangle just to show you how the yellow triangle underneath is lined up. Don’t actually fold yours when you piece!) Always match up the points of your new triangle with the dog-ears on the seam allowance of the previous pair you sewed together. (A dog-ear is the little point that is made when angled seams are sewn.) And again, keep an eye on the straight-of-grain! Remember, make sure the straight-of-grain edge is always on the left as you’re piecing.

Stitch another 1/4” seam, as shown.

Prior to pressing this new triangle, if all goes well, your 1/4” seam should hit exactly at the intersection of your newest triangle with that first triangle, as labeled in the photo above. As long as your seam hits where mine does, your triangles will line up nicely!
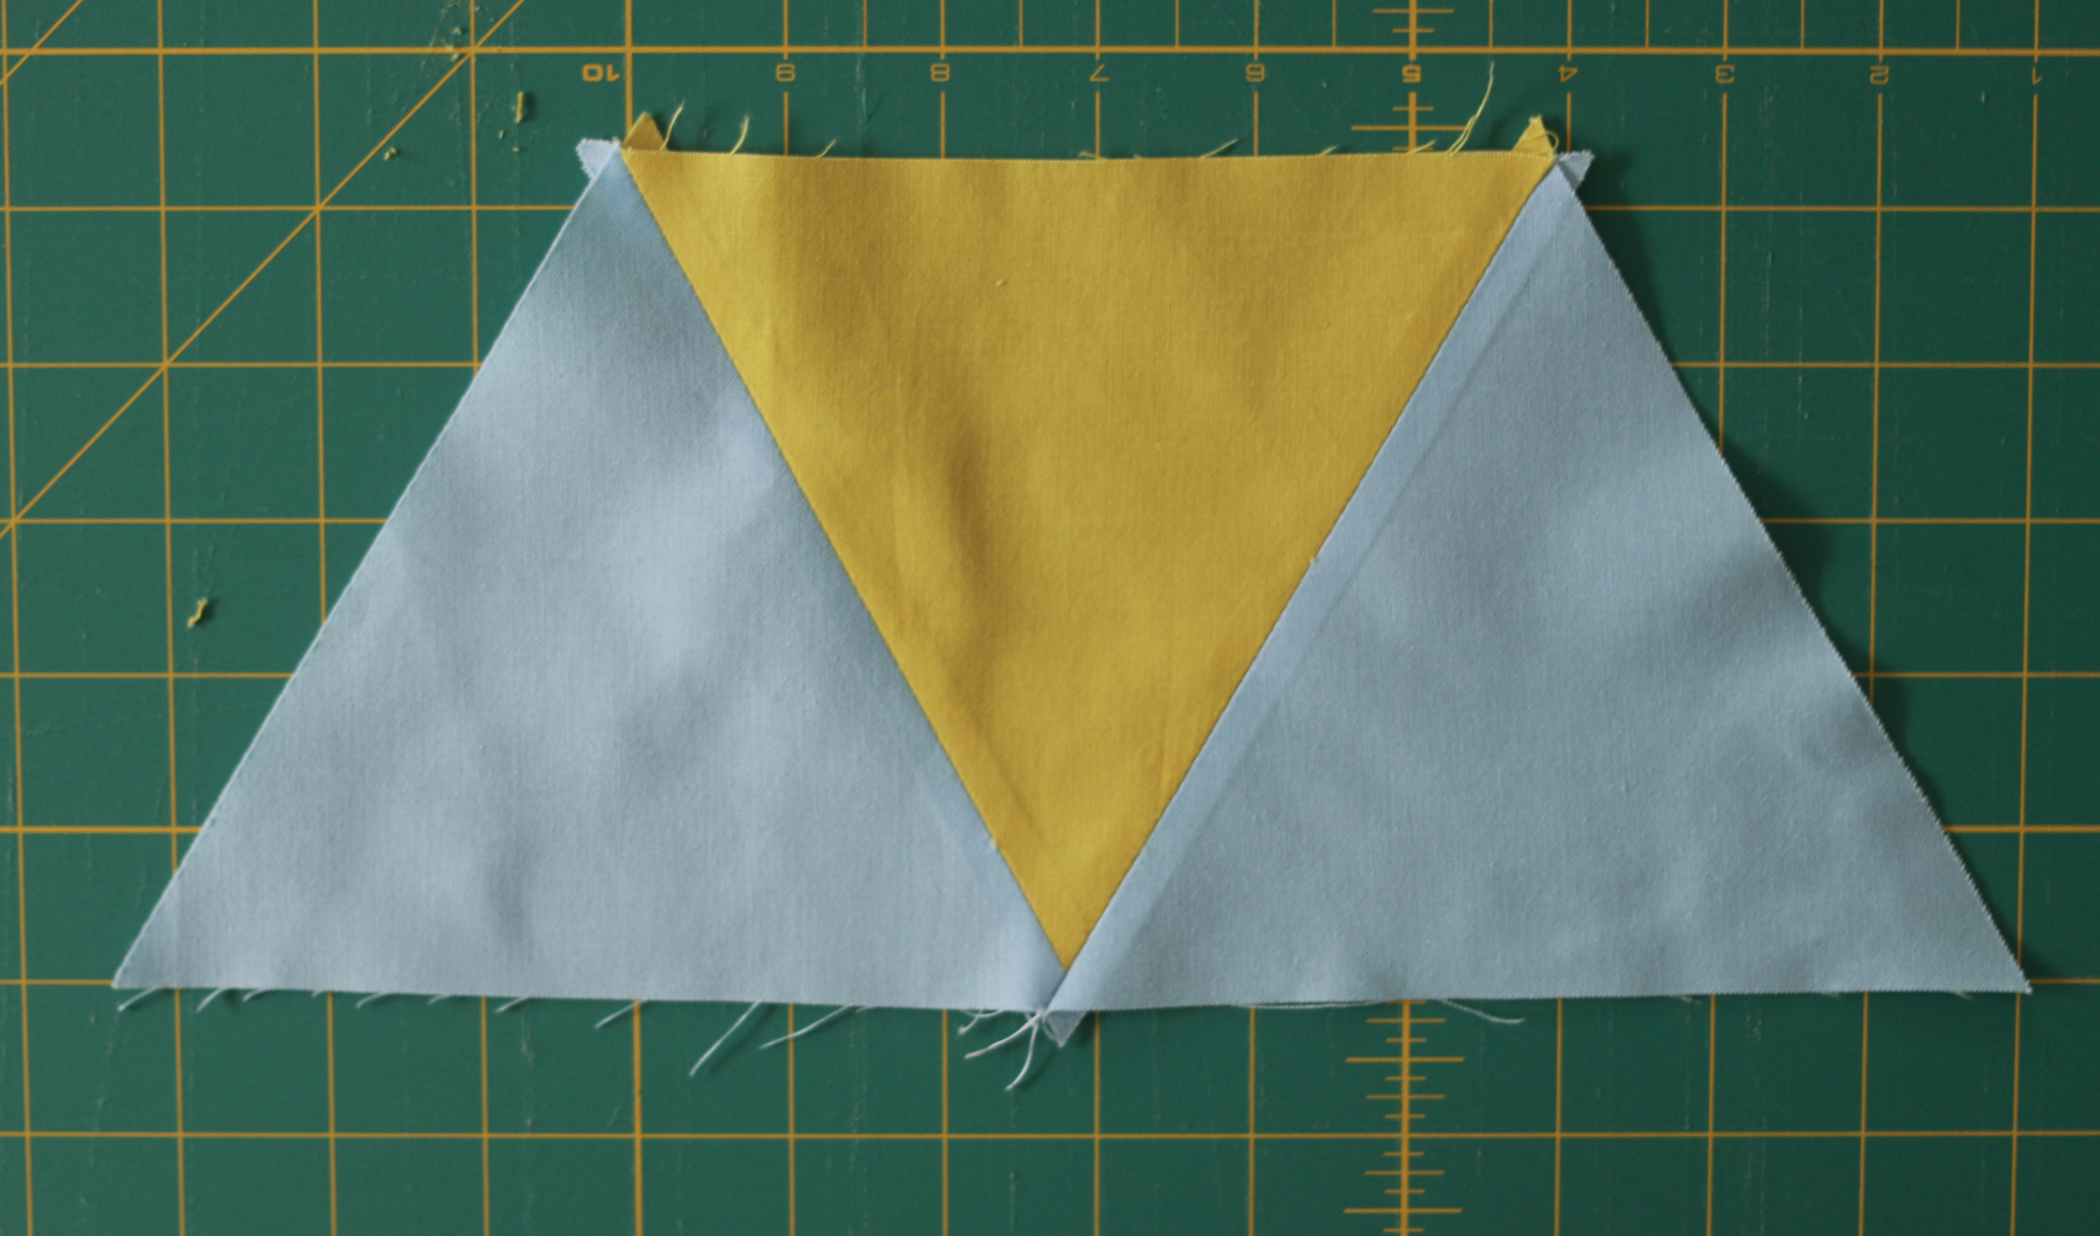
Now you have three triangles together! You’ll notice that the point of the yellow triangle hits exactly 1/4” in from the raw edges of the blue triangles. This is perfect—when you sew the rows together later, you won’t lose any points thanks to that 1/4” of seam allowance. Continue adding more triangles in the same way, from left to right, until your row is completed.

Once you’ve sewn your rows of triangles, then it’s time to sew the rows together into a quilt top.

Match up two of your pieced rows, right sides together, with those triangle tips lined up. I like to pin at each triangle tip.


That’s it! Perfection is yours!
In Part 3 of my series on triangles, we get to talk about design! This is what I really love about equilateral triangles—the design possibilities are endless. So come back next week and see what you can do with all these triangles you’ve been cutting and piecing!