
Chandelier Quilt-Along, Week 1 – Fabric requirements and cutting instructions

Welcome to the Chandelier quilt-along! When I designed this quilt, it was one of those rare but wonderful instances when I felt like the design meshed perfectly with the fabric line I wanted to use. I’m using the Emmy Grace line by Bari J., from Art Gallery Fabrics, and I think this modern twist on a traditional quilt block suits Bari’s vintage aesthetic nicely!
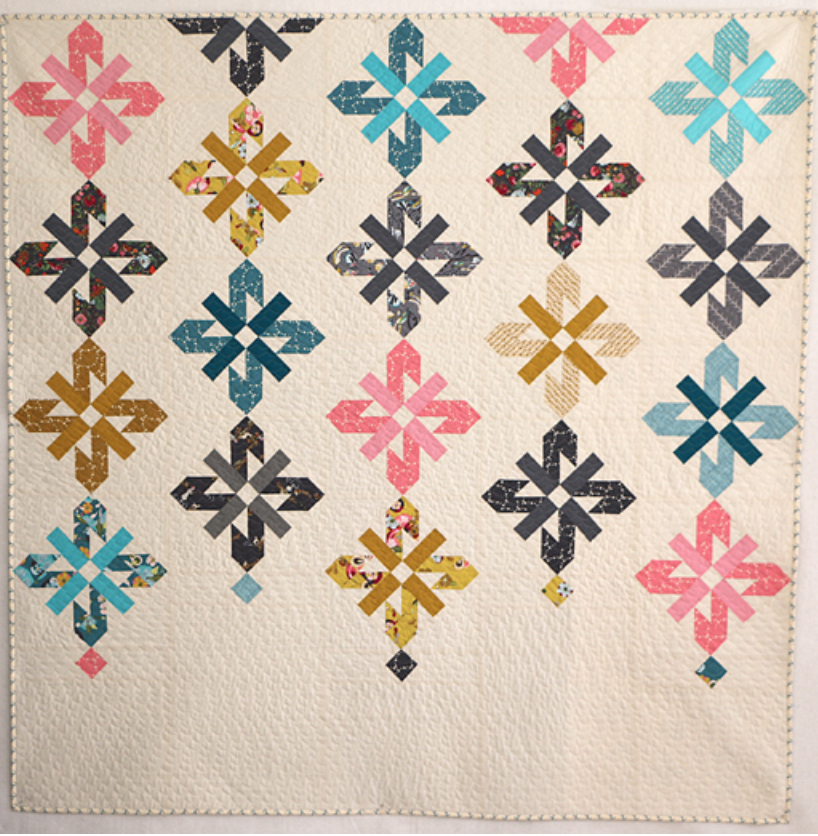
And before you ask about the difficulty level—this quilt is easier than it looks. I’m using the square-in-a-square structure to avoid setting the blocks on point. Square-in-squares can be finicky, but I’ve got some tips that I think will help you get these blocks just right. And even if there are a few that are a tiny bit off, the way the blocks are laid out is actually quite forgiving. You only have to match points at the tops and bottoms of the blocks—it’s not quite so crucial on the sides. So I think you’ll get great results either way.
Finished Size – 59-1/2″ x 59-1/2″
Ready to get started? Here’s the schedule:
Week 1 – Fabric requirements and cutting
Week 2 – Making the blocks
Week 3 – Assemble the top, baste and quilt
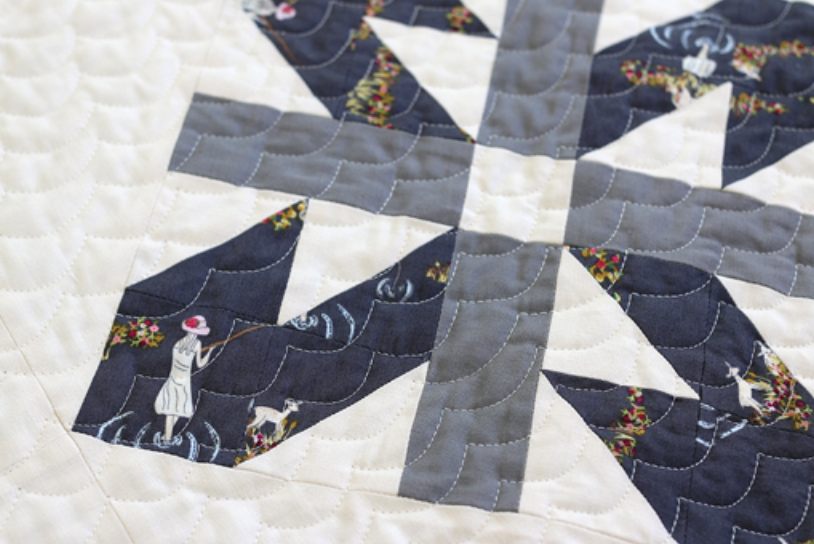
I’ve got a fun, easy way to get the scallop quilting you see here, using a decorative stitch on your machine and the walking foot or even-feed foot. If you can straight-line quilt, you can do this scallop quilting!
Fabric Requirements
See fabric requirements and cutting below, or click here for a downloadable, printable PDF with all the fabric requirements and cutting specifics!
1/4 yard of each of the following Emmy Grace prints (fat quarters will work)
-OR- a total of about 3 yards of various prints, in 3-4 different colors:
• Ripples in Rose (pink)
• Floral Floats in Field (gold)
• Knotty in Sunbeam (gold)
• Ripples in River (gold)
• Budquette in Nightfall (dark gray)
• Ripples in Pond (dark gray)
• Fawn Day in Murk (dark gray)
• Painted Ladies in Flutter (gray)
• Stitched Road in Granite (gray)
• Floral Floats in Fresh (blue)
• Little Town in Blues (blue)
• Knotty in Rain (blue)
• Ripples in Sea (blue)
Other fabric:
• Off-white solid for background (I use Kona Cotton in Bone) – 2-3/4 yards
• Pink solid (I used Kona Cotton in Bubble Gum) – 1/8 yard
• Yellow solid (I used Kona Cotton in Yarrow, but Citrus would also work) – 1/8 yard
• Blue solid (I used Kona Cotton in Breakers, but Glacier or Everglade would also work) – 1/8 yard
• Gray solid (I used Kona Cotton in Graphite, but Pewter, Coal, and Steel would also work) – 1/4 yard

Cutting List
From the Emmy Grace prints:
From Ripples in Rose:
• 23 squares 2-3/4” x 2-3/4”
• 13 squares 2-1/4” x 2-1/4”
From Floral Floats in Field:
• 12 squares 2-3/4” x 2-3/4”
• 8 squares 2-1/4” x 2-1/4”
From Knotty in Sunbeam:
• 6 squares 2-3/4” x 2-3/4”
• 4 squares 2-1/4” x 2-1/4”
From Ripples in River:
• 6 squares 2-3/4” x 2-3/4”
• 4 squares 2-1/4” x 2-1/4”
From Budquette in Nightfall:
• 12 squares 2-3/4” x 2-3/4”
• 8 squares 2-1/4” x 2-1/4”
From Ripples in Pond:
• 11 squares 2-3/4” x 2-3/4”
• 9 squares 2-1/4” x 2-1/4”
From Fawn Day in Murk:
• 6 squares 2-3/4” x 2-3/4”
• 4 squares 2-1/4” x 2-1/4”
From Painted Ladies in Flutter:
• 6 squares 2-3/4” x 2-3/4”
• 4 squares 2-1/4” x 2-1/4”
From Stitched Road in Granite:
• 6 squares 2-3/4” x 2-3/4”
• 4 squares 2-1/4” x 2-1/4”
From Floral Floats in Fresh:
• 6 squares 2-3/4” x 2-3/4”
• 4 squares 2-1/4” x 2-1/4”
From Little Town in Blues:
• 6 squares 2-3/4” x 2-3/4”
• 4 squares 2-1/4” x 2-1/4”
From Knotty in Rain:
• 6 squares 2-3/4” x 2-3/4”
• 4 squares 2-1/4” x 2-1/4”
From Ripples in Sea:
• 12 squares 2-3/4” x 2-3/4”
• 8 squares 2-1/4” x 2-1/4”
Plus cut an additional 5 squares, 2-1/4″ x 2-1/4″ from 5 different prints. These will be used for the diamonds at the end of each row of blocks, which we will make in Week 3.
From the Solids:
From the off-white solid:
• 38 squares 7” x 7”, cut in half diagonally from corner to corner to make 76 triangles
• 3 pieces 12-1/8” x 10-1/2”
• 2 pieces 12-1/8” x 16-1/2”
• 20 squares 1-3/4” x 1-3/4”
• 115 squares 2-3/4” x 2-3/4” (These squares are for the half-square triangles. We will be making our HSTs the standard way, 2 at a time and squaring up. If you would like to use a different method of making HSTs, you’ll need to calculate accordingly.)
• 10 squares 2-1/4” x 2-1/4”, cut in half diagonally from corner to corner
• 10 pieces 3” x 5-1/8”
From the coordinating colored solids:
• Pink: 14 pieces 1-3/4” x 4”
• Yellow: 16 pieces 1-3/4” x 4”
• Gray: 26 pieces 1-3/4” x 4”
• Blue: 20 pieces 1-3/4” x 4”
Enjoy your cutting, and I’ll see you back here next Monday for the next installment–making the blocks!