
What is a scant quarter-inch seam, and how do I get it?
This post is part of my Quilting 101 series! See more of my Quilting 101 posts here
The perfect scant quarter-inch seam. Achieving it is the holy grail of quilting, friends. If you’ve got it, a whole universe of accurately pieced designs can (and probably is!) yours. But too many of us don’t have it.
If you’ve ever wondered why your seams don’t line up, or why your blocks aren’t coming out exactly the size they should be, I would bet my entire fabric stash that your scant quarter-inch seam is to blame. Read on to find out what exactly a scant quarter-inch seam is, why it’s so important, and how to get it.
What does “scant” mean?
A scant 1/4” seam is just a thread or two short of exactly 1/4”. So, 1/4” minus the widths of one or two threads is what you’re aiming for.

Why should I use a scant quarter-inch seam on quilting projects?
How can a few threads-width make a difference? Because you need to account for the width taken up by the seam itself. Being just a thread-width off may not seem like a big deal, but when you add up that thread-width for every seam in your block (or across the entire quilt), suddenly that becomes a substantial difference. So remember to keep it scant!
Easier said than done though, right?
My tried-and-true method for sewing a scant quarter-inch seam
There are a variety of presser feet and other tools available for achieving a perfect scant quarter-inch seam, and some methods may work better for you than others, so as always with quilting, many roads lead to the same place. But after trying several of these options, I always came back to the same method, which is a combination of a standard quarter-inch presser foot (sometimes called a patchwork foot), plus using the markings on the stitch plate.

Most sewing machine brands either come with a quarter-inch foot or have one available that you can purchase. The presser foot I use on my Bernina 770 QE is the 97D dual-feed foot. (I use Bernina’s 97D dual-feed foot because my machine is a dual-feed machine. If your Bernina model does not have dual feed, you’ll want the 37 foot).
Quarter-inch presser feet are designed so that you line up the fabric with the edge of the foot to achieve your quarter-inch seam. My quarter-inch foot does not have an attached fabric guide. I find I actually get better results without a fabric guide. When I’ve used presser feet that have fabric guides, I find it hard to see when the fabric is pressed up too close to the guide or isn’t quite close enough. So ironically, I feel like I have more fine-tuned control over fabric alignment when there is no guide.
But I don’t rely solely on lining up the edge of the fabric with the foot—I also use the markings on the stitch plate. You can see my quarter-inch mark labeled in the photo above.
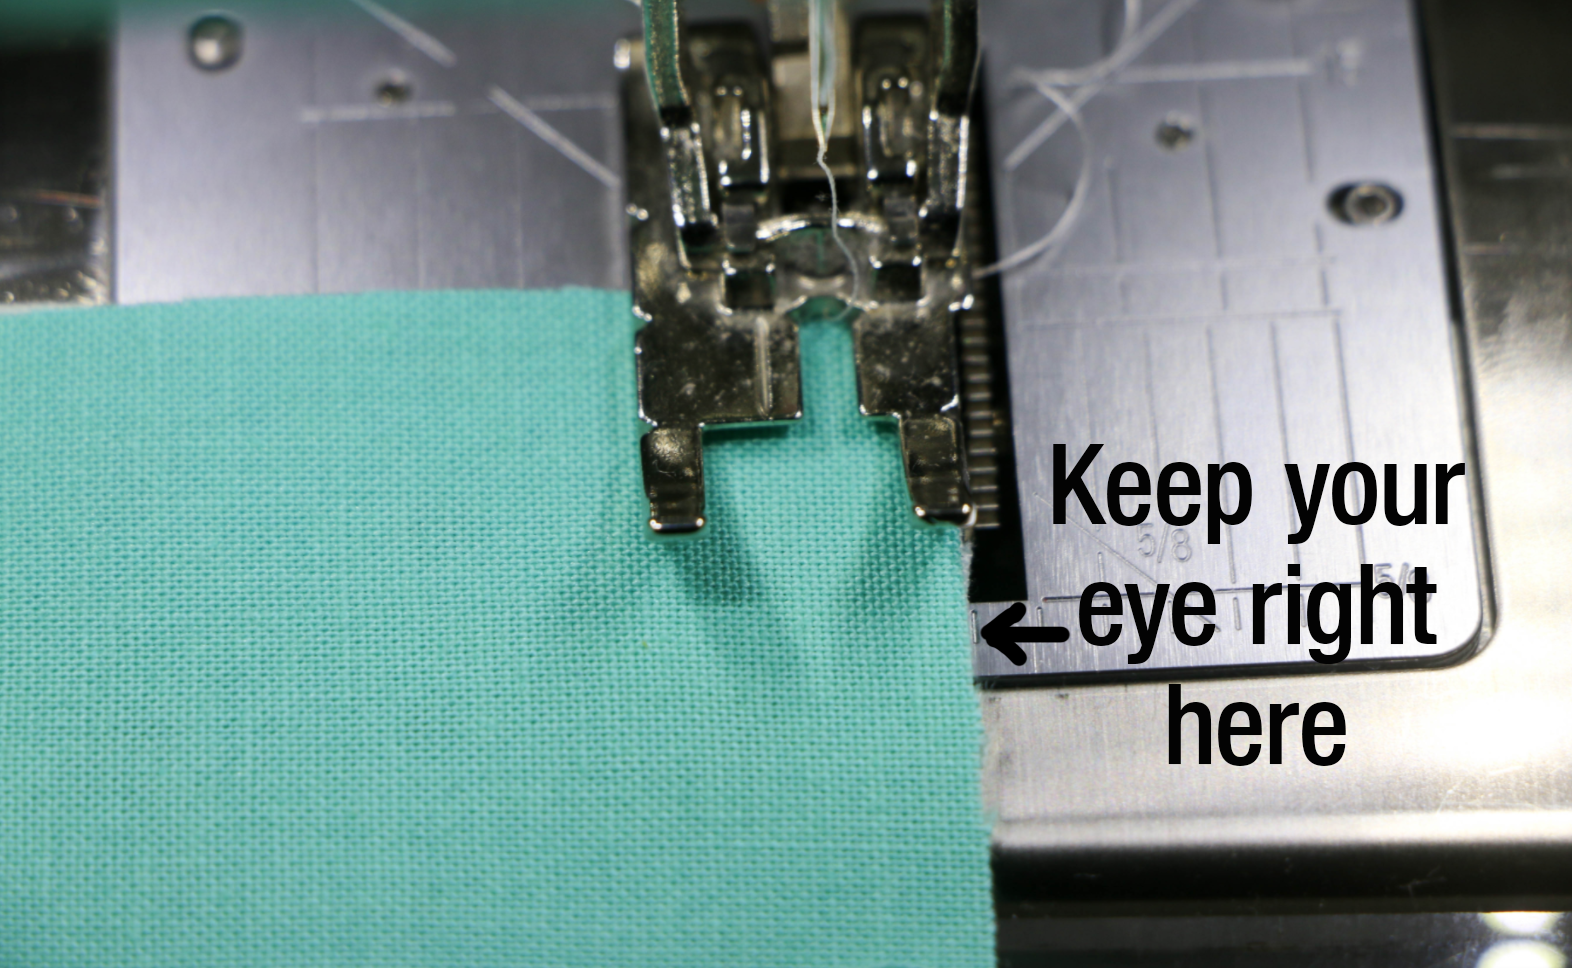
As I’m feeding the fabric through my machine, I make sure the fabric is just to the left of that quarter-inch mark, and I always try to focus my eye just ahead of the foot, right on that quarter-inch mark. (The photo above shows how I line things up.) I think people tend to look at the needle as they’re stitching, or along the side of the foot where it’s even with the needle. But if you’re adjusting the fabric based on where the needle hits it, that’s too late to make meaningful adjustments! Looking a little ahead of the foot is much more conducive to making needed adjustments as you feed the fabric.
So as I’m stitching, I watch that quarter-inch stitch mark like a hawk, and I make sure my fabric stays lined up just a hair to the left of it (as shown in the photo above). I occasionally check that the fabric still is lined up with the edge of the foot as well.
It takes a little practice, but this is the method that gives me my best, most consistent scant quarter-inch seams.

How to test your scant quarter-inch seam width
Still having trouble with accurate seams and block sizes? It might be time to test your 1/4” seam, to make sure you’ve got that perfectly perfect scant width! Sometimes, your needle can get slightly out of position and may need to be adjusted in order to achieve a scant 1/4”.
To test your scant quarter-inch seam, cut 3 squares, 2-1/2” x 2-1/2”. (I like to cut two squares from one print and one square from a contrasting print, to make measuring easier later.) Sew the squares together and press seams as you normally would.
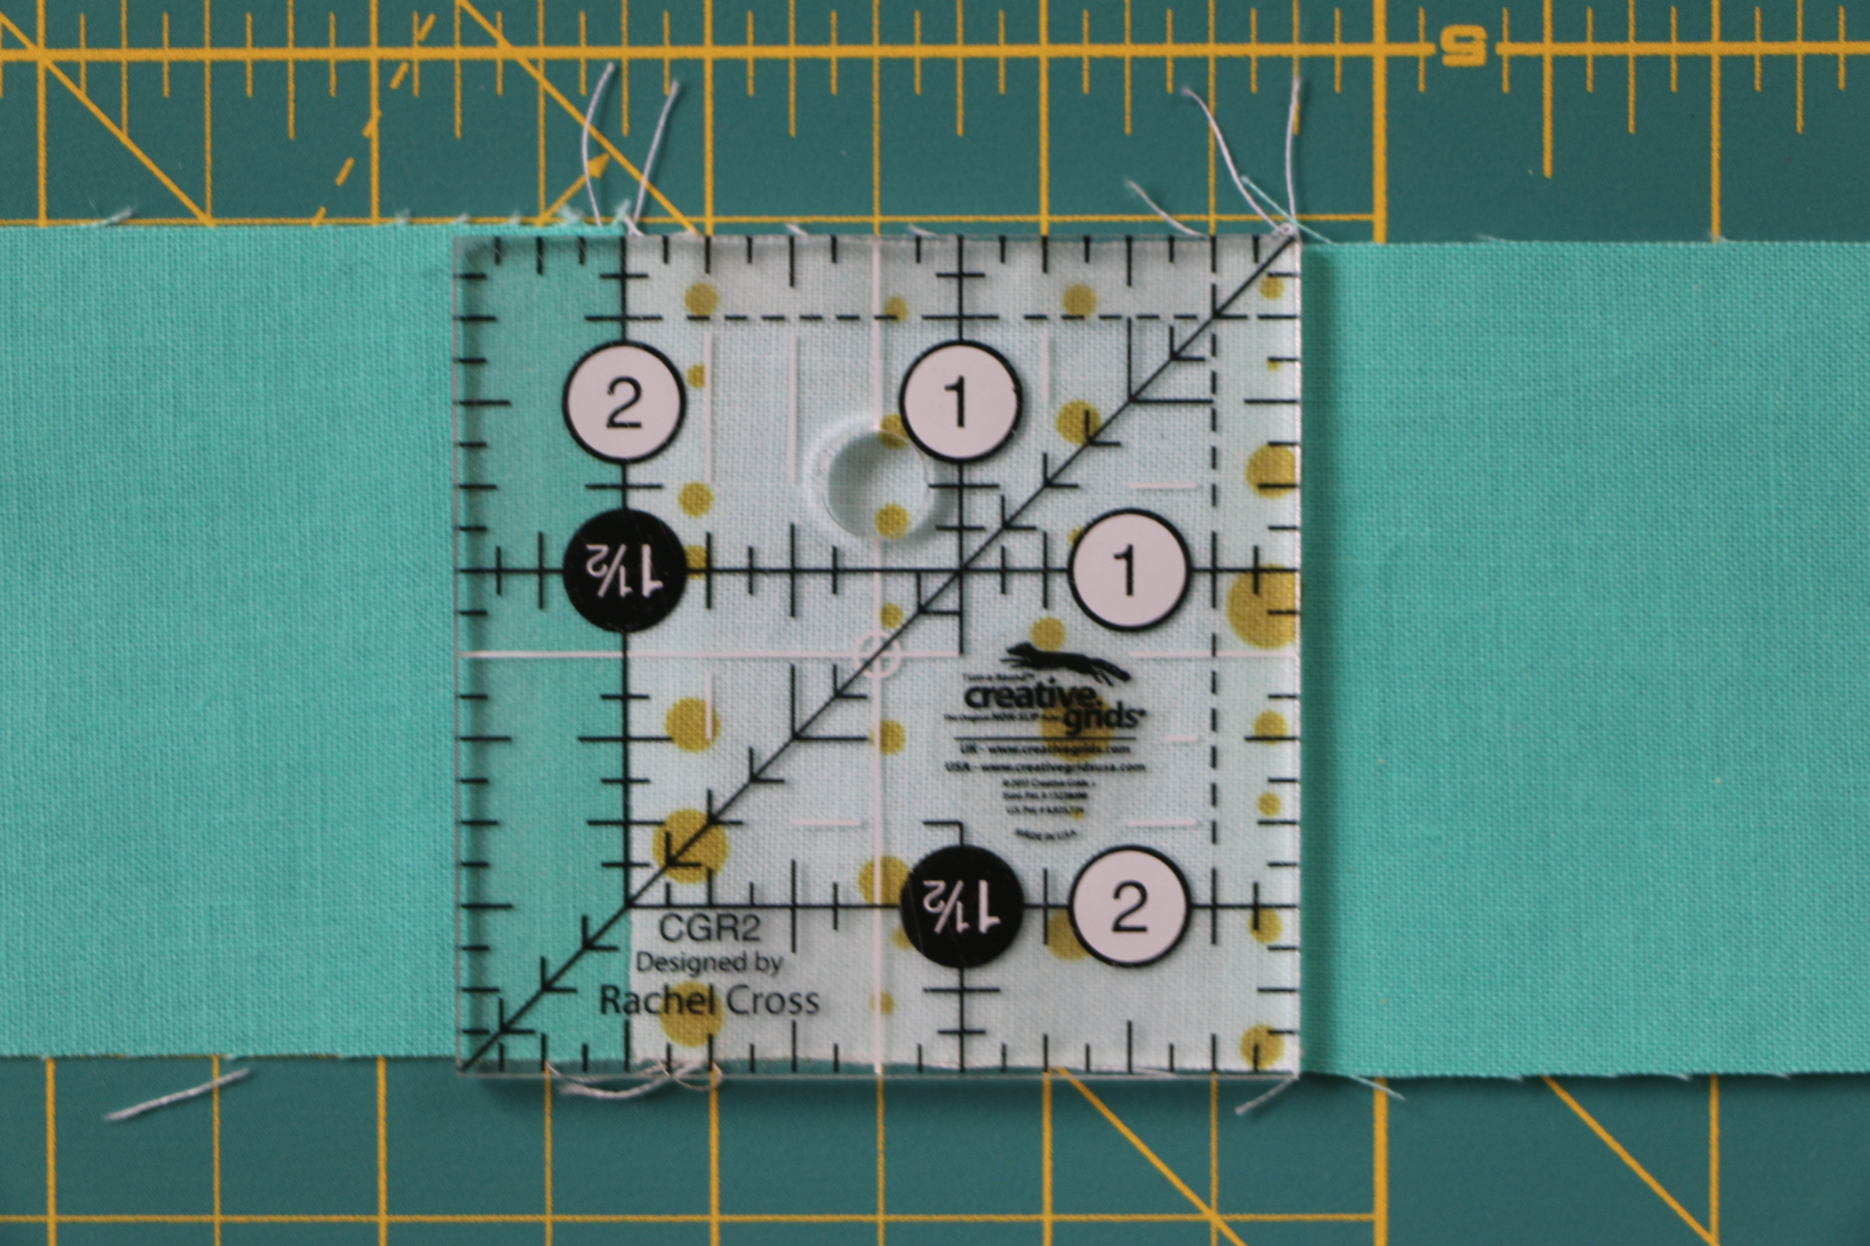
Now measure. The square in the middle should be exactly 2” wide.
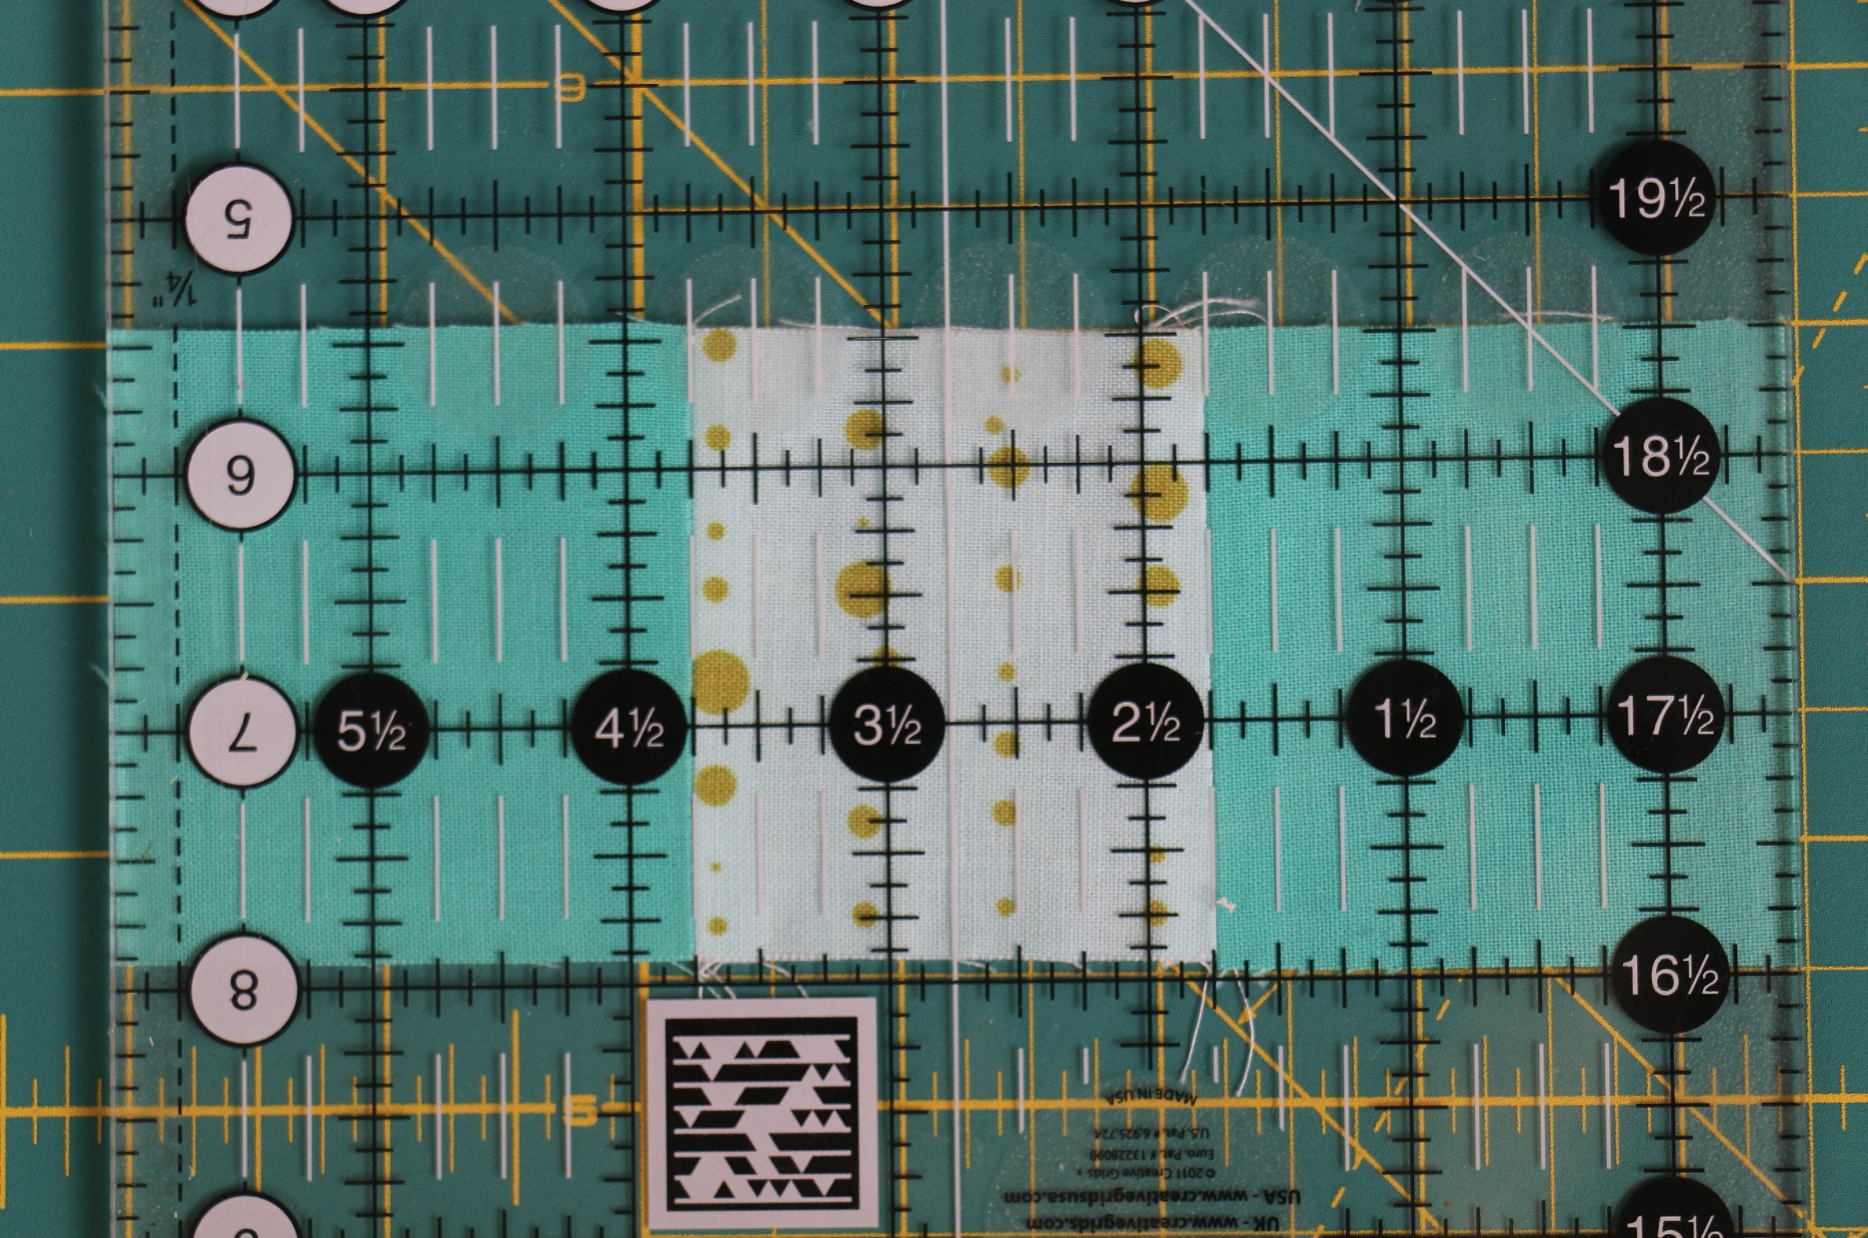
And all three squares together should measure exactly 6-1/2.”
If everything measures up precisely, congratulations! You’ve got a perfect scant 1/4” seam. If you find your squares aren’t measuring exactly as they should be, your needle position may need to be adjusted. This can be corrected by your sewing machine dealer, or you can manually adjust the needle position on your machine. (Though if you’re using a single-hole stitch plate, you will want to be cautious about manually changing the needle position.)
If your sewn pieces are measuring too large, your needle should be moved to the left. If your sewn pieces are measuring too small, your needle should be moved to the right. Yes, this sounds counter-intuitive, but it’s correct! By moving your needle to the left, you are making your seam slightly wider, resulting in smaller sewn pieces. And vice-versa by moving the needle to the right.
Hopefully this has given you all the tools you need to get that perfect scant quarter-inch seam, which will make all your quilting projects go a lot more smoothly! And for more posts like this on quilting basics, check out my Quilting 101 series.